Module 5

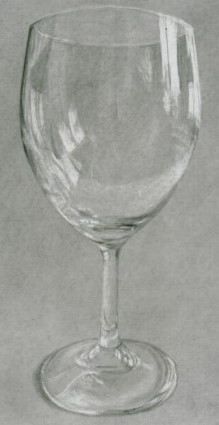
We then place a transparent wine glass on a wooden table so that we have a light object against a dark background. This will be our drawing for today.
You will then learn what to look out for when drawing transparent objects.
I will demonstrate how the light affects the glass so that you know what to look out for when drawing glass objects.
We then do an experiment to see what the difference is between a transparent object and a solid, clear object. After this demonstration you will never panic again when you need to draw a clear or transparent object.
You will learn how to tone a background very quickly without using up half a pencil in the process.
Then I will show you a cool trick to transfer the outlines of the glass onto a darkened background.
The next secret I reveal is the question I ask myself which tells me when I need to add lots of detail and when I will just be wasting my time. This question saves me hours of drawing time over other artists.
We then start the drawing. I hope you are drawing with because this is such a fun drawing to do and easier than you ever imagined.
You will learn the difference between positive and negative drawing and how we can create an amazing realistic looking glass by combining the two in the same drawing.
I then show a cool way of using the kneaded eraser to create the illusion of distance between the front and the back face of the wine glass.
You will learn what a "neutral" pencil is when drawing negatively, when to use it and why.
We will then learn how to create the illusion of "seeing" a transparent object and all the wonderful light effects inside it.
Become a Member Today
You can view the full course info again HERE
or click the Add to Cart button below to start the course right away.

